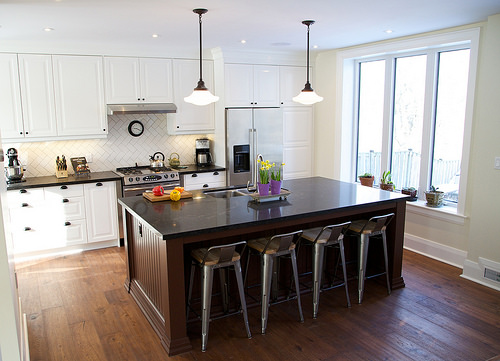
It’s not lost on me for one second just how ridiculously lucky I am to have been able to, with my hubby, undertake this immense renovation project and be able to design something exactly the way we wanted it. I feel sort of self-conscious sometimes talking about what we’ve done here, knowing that others can only dream of being able to do something of this magnitude. But what can I say? I’m also very proud of it.
We didn’t use an interior designer, although we had a lot of help from the talented Ross Etherington (an OCAD University graduate!) of Etherington Designs in creating a vision for specific aspects of the renovation. He created 3D models of our Ikea kitchen, and designed and built our magnificent custom island. Our general contractor team of Argyris & Clinkard realized the project and continue to be here on a regular basis putting finishing touches on, and responding to small repairs or customizations. And as soon as winter releases its icy grip on us, they’ll be back here building us a new deck and coordinating our landscaping needs.
But back to the kitchen, which is almost entirely finished, except for the installation of Chris’s keg fridge into the island.
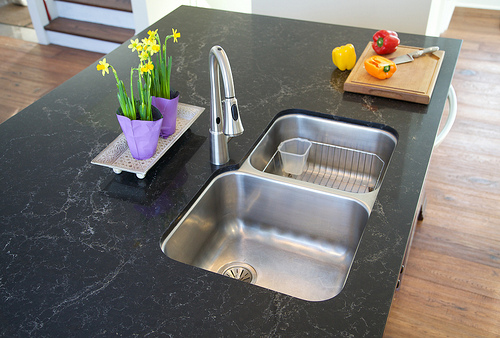
We splurged a bit on a new Caesarstone colour way that came out this year, called Vanilla Noir. We had originally made a different selection but had not yet ordered it, and then I came across this in a magazine. We’re thrilled we opted to spend the few hundred dollars more to get the new colour way — it’s stunning, and looks a lot more like granite than other types of quartz countertops, without the headaches that come with granite (i.e. it’s non-porous, requires virtually no maintenance or sealing, and is more heat resistant).
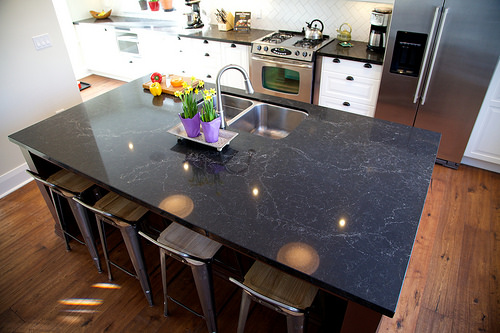
We opted to keep the nearly new 30″ stainless steel stove that came with the house to save money, but installed two stainless panels along the sides so that, if eventually I want to upgrade to a 36″ range, all we’ll need to do is trim the countertops. We chose an impressively quiet but powerful 36″ hood by Broan that sits under the cabinets and ventilates straight back, allowing full use of the kitchen cabinets above. Trust me — you do not need to spend the money on a Thermadore or Vent-A-Hood to get top notch performance. This thing is unbelievably quiet and incredibly powerful. I rarely need more than the lowest setting for regular cooking, but on occasion if I’ve burnt something (it happens) or I’m doing particularly steamy kitchen work such as canning, I can crank it up full blast.
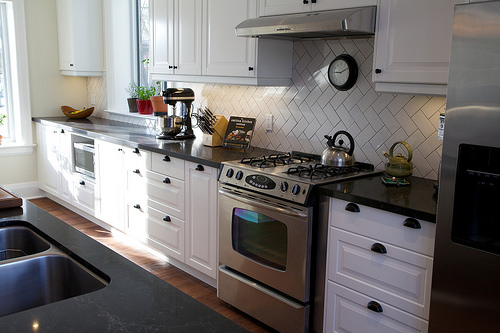
While we frequently use a microwave, I didn’t want it to take up a dominate spot on the countertop. Because we have a window along the length, there actually isn’t a huge amount of space to rest appliances. But I also couldn’t justify spending $800 on a drawer-style microwave. I mean, seriously? $800?? When you can get a regular one for $100 or so, that just didn’t seem even remotely reasonable. So Ross helped us design a section of the cabinetry for the existing microwave that involved a couple custom cabinetry parts, and we had the electrician put an outlet in the back. This way the microwave sits under the counter but is completely accessible for use. There’s enough space on top of the appliance for the spatter guard to sit when we’re not using it, and plenty of room around the appliance for proper ventilation. I had to place a no-slip liner under the microwave so that when we open and close it, it stays put. Overall, this compromise is working marvellously well.
Speaking of the windows. The one along the countertop section wasn’t there before and was added to the structure of the house to maximize solar gain and to improve sight lines to the street. We also had to shorten the window on the front side of the house to accommodate the addition of a powder room to the main floor of the house. Both have lovely deep windowsills — perfect for a little indoor herb garden. The original kitchen had a wall of windows that faced the neighbour’s house, closer to the ravine side, closing in what was originally an old porch. That entire wall was bricked in and properly insulated, and allowed us to maximize that wall of the house for the cabinetry, stove and fridge.
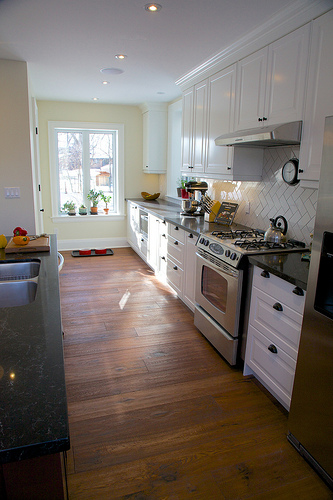
I have an extraordinary amount of storage space, especially given that Ikea’s kitchen cabinetry is so well designed, and includes so many options for shelving, pull out baskets and drawers. I’ve got a wicked spice drawer (finally!) and a top notch pantry. The island also features some cabinetry in front of the seating. We’ve even managed to keep the garbage and recycling out of sight and in cabinets, so that we don’t have to clutter up floorspace with bins. I had to invest in a nice wood step stool (Bekväm by Ikea in dark brown) so that I can reach some of those awesome cabinets. I’m not really that short but we hung the cabinets 19″ above the counters so that we could accommodate under cabinet lighting, valances and our rather tall coffee maker. Chris wasn’t so keen at first on having this stool kicking around, but I keep it in front of one of the back windows where the cat can enjoy it, and it can serve as an impromptu chair when needed.
We’re still working on finishing touches around the built in cabinets around the fireplace, so when I can finally photograph them in their full glory I will share that here. In the meantime, I’ve got some cooking to do!